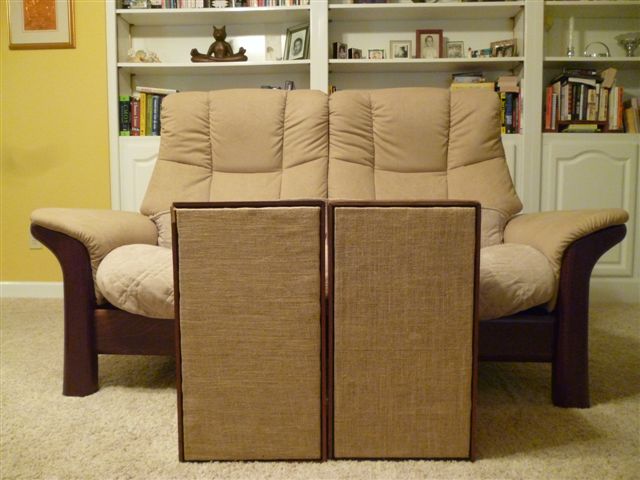
A recent bit of Craig's List diving produced a nice find...A PAT-5 Preamp, an SE-10 Equalizer, a pair of A-25 Loudspeakers, and a pair of A-35 loudspeakers. This page concentrates on the speakers, and the restorations that I did on the cabinets and grille cloth. My restoration methods owes a large debt to a poster on the AudioKarma web site.
All four speaker cabinets were in pretty rough shape. The A25's were relatively ok, as 40 year old speakers go...the A35's had spent some time as submarines, and their cabinets and grill cloth showed it. Thankfully, it looked like the drivers remained above the water line.
I hooked up the A25's to an updated Stereo 120 with super heatsinks, and asked Count Basie and his band to do the honors. Wow!!! I was bowled over. What a speaker! No wonder these things sold more than one million pairs! This was definitely worth the work of a cleanup.
Thanks again to the AudioKarma poster who recommended Howard Products "Restor-A-Finish". It comes in a number of colors. I picked "Golden Oak", not because I thought it was the best match (I think that would have been the Cherry), but it was the closest color available at my local Home Depot. Interestingly, no one at Home Depot seemed to know they had it on the shelves. They had to look it up in the computer. They also didn't have the color chart handy. Come on, Home Depot, get your act together!
I also picked up some 0000 (super fine) steel wool, as recommended by Howard Products, to apply the Restore-A-Finish when it's in pretty rough shape. To top off the shopping trip, I bought Howard Product's "Feed-N-Wax", and hurried home with my haul. I dragged everything to the screened in back porch, where the speakers had been airing out for a day or so (submarines typically don't smell that good). The "Restor-A-Finish" works great, but you'll want to use it where you have PLENTY of ventilation and fresh air.
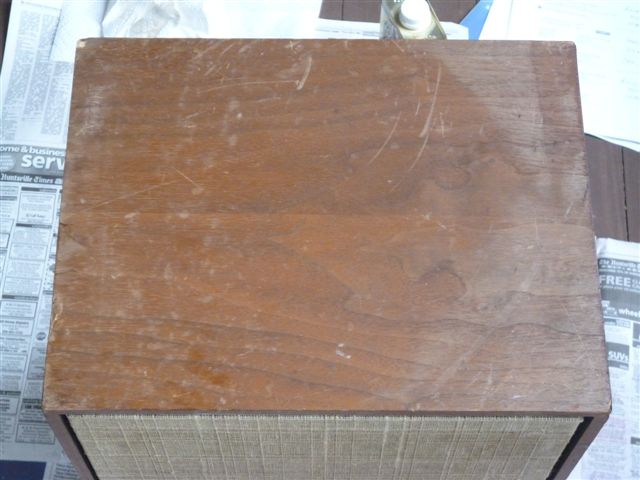
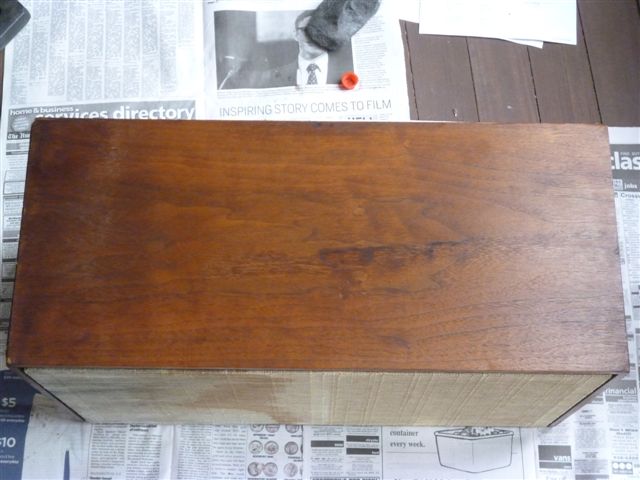
Once the speaker cabinets were free of surface dust and dirt, I spread them out on newspapers, and got to work. I used disposable gloves (available at most supermarkets, used for food preparation) to keep the chemicals off my hands. I opened the Restor-A-Finish, held a pad of 0000 steel wool over the top, and inverted the two together to apply the solution to the steel wool. Then, following label directions, I just applied it to the cabinet, moving with the grain. In the case of white marks on the cabinet, you can actually scrub fairly hard (with the grain), and the white marks come out.
The transformation is instant and amazing. But, don't get lost admiring your work. Keep with the program, and right after applying the Restor-A-Finish to one whole side of the speaker, wipe it off with a paper towel. Continue wiping until the paper towel comes up pretty clean. Do the four finished sides of the cabinets and the exposed trim edges.
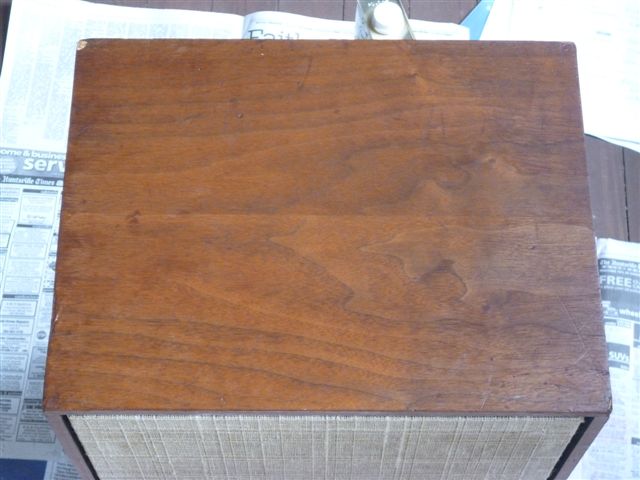
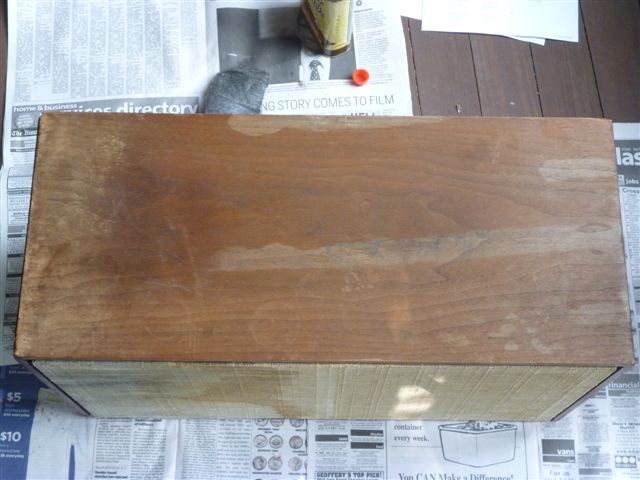
Once you've restored the finish, Howard Products "Feed-N-Wax" will keep it looking good. Just follow the label directions. I used an old t-shirt to apply liberal amounts of Feed-N-Wax, then let it sit for about 30 minutes. Even if the original application seemed kind of thick, a lot will soak in after 30 minutes, especially if the wood hasn't been treated in years. I then took a second clean, old t-shirt, wiped the excess, and buffed the finish to a smooth shine. The orange oil in the polish makes it smell nice, and makes the surface very smooth. As a matter of fact, after polishing, be careful as you hoist the speakers that they don't slip out of your hands.
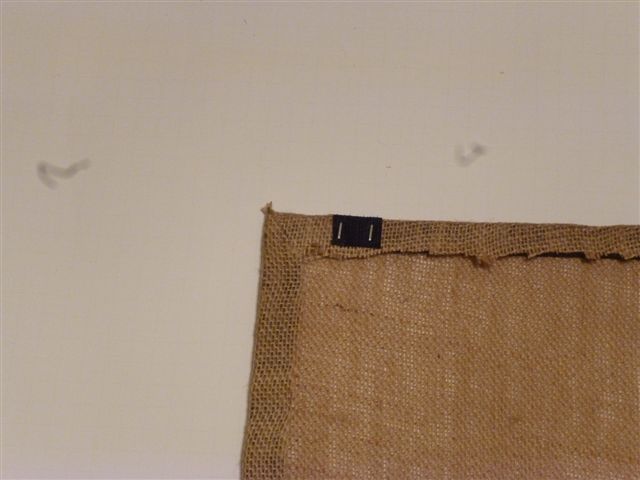
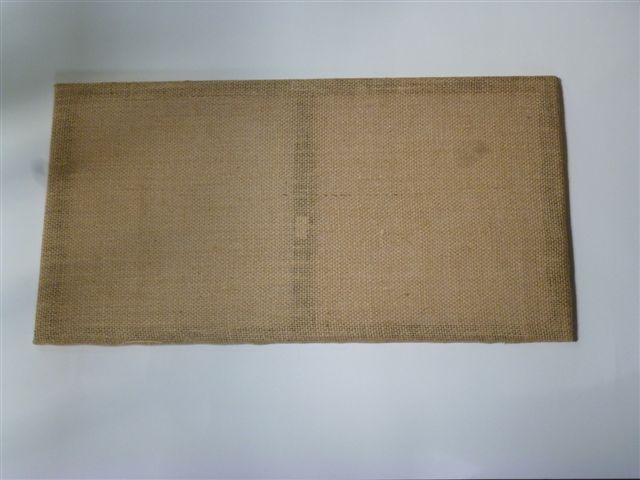
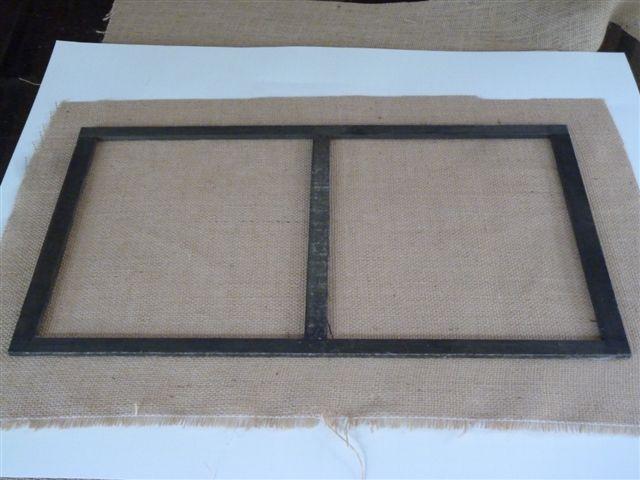
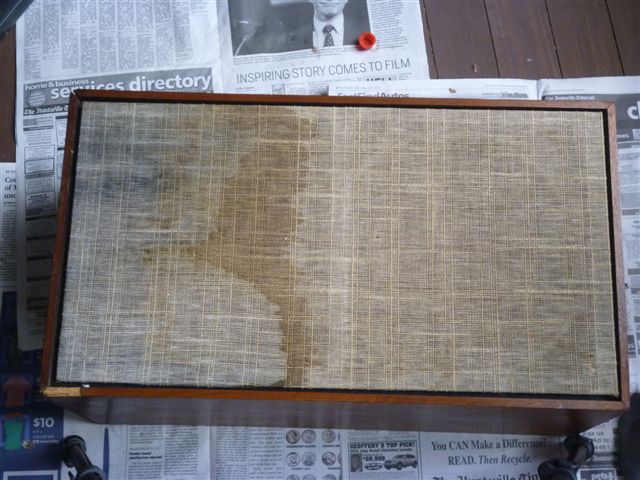
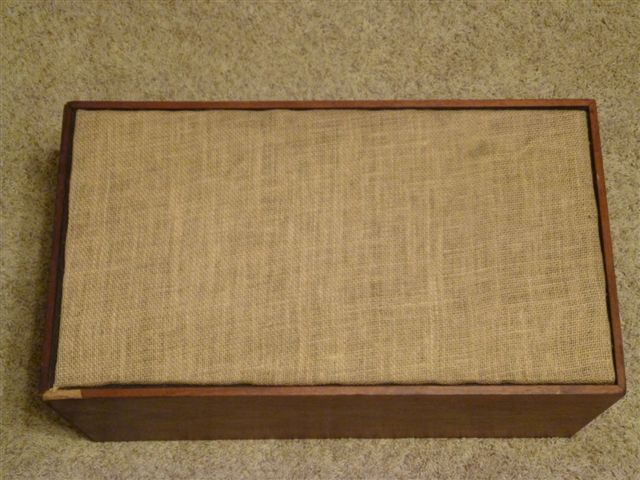
Now that the boxes looked so good, it was time to clean up the grille cloths on the submarine A-35 speakers. Here are the before and after pictures of that process. You can tell it's the same enclousre by noting the presence of the same hole in the veneer (lower left corner).
The supplies you'll need are commonly available at Walmart, Lowes, and Home Depot.
Remove the grill cloth and frame from the A35's. My A35 grilles they were attached with velcro, and were easy to remove. The A25 frames are screwed or glued in, so the removal is somewhat more difficult. I haven't done this myself on A25's so I won't say more for now.
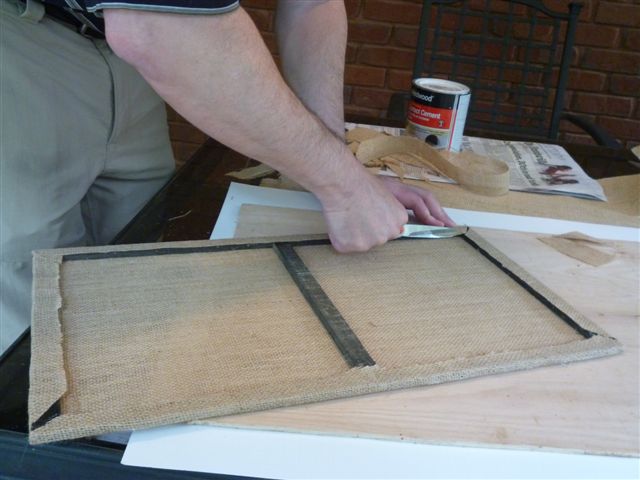
Cut the old grill cloth the long way down the center of the frame. Remove the velcro patches and the staples that hold them in. Using the grill cloth as a handle, carefully pull it off the frame, being careful not to overstress the frame. If you hold the grill cloth near where it attaches to the frame, you can get most of it to come off cleanly even though it's glued to the frame. Use the edge of the utility knife to scrape along the frame, removing whatever of the grille cloth fabric that didn't come cleanly in the previous step.
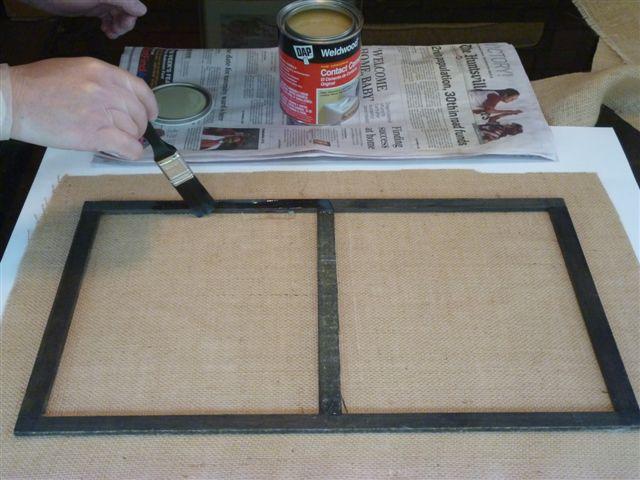
Set up in a place with good ventilation, as the next step uses contact cement. In preparation for that step, make sure that you've spread out papers to prevent contact cement from getting on your work surface. Also, get your gloves ready.
Lay the cleaned up frame down on top of the new burlap grille cloth. If the burlap hasn't been stored flat, you might do well to iron it a bit so the final result will lay flat. Square up the burlap to the frame, and using the frame as a guide, cut the burlap about 1.5" wider than the frame on all sides of the frame. If the burlap has frayed edges, you might want to make sure that the 1.5" includes solid fabric.
Put on your gloves, then open the contact cement and stir it according to the label directions. Make sure you have plenty of ventilation.
Using the 1" brush, brush a layer of contact
cement onto the outside flat surfaces (e.g. not the center bar) and the outside edges of the frame. Then brush a layer of contact cement onto the
burlap, adjacent to the frame, about 1" wide outside the frame. It will soak in quite fast, so make sure you've used enough cement
that its presence is visible as a change in color of the burlap, but don't use too much (e.g. a pool of contact cement is way too much!).
Leave the burlap and the frame in a quiet place and let the contact cement dry for at least 20 minutes (it may take longer). Consult the directions on the contact cement for recommended drying time, and the feel of the dry contact cement. While you're waiting, find another set of hands to help with the next step.
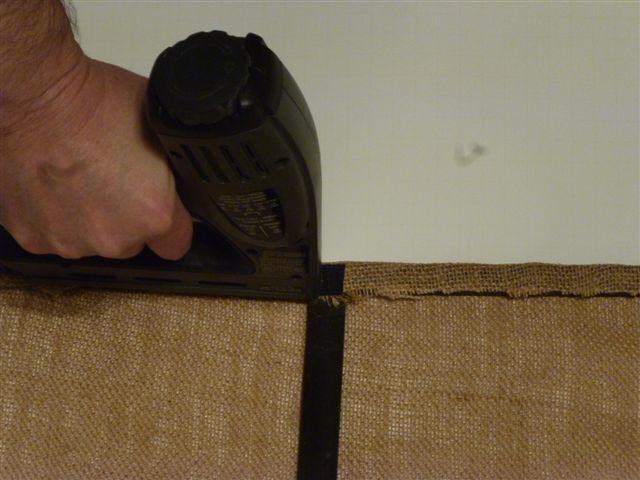
Once the contact cement is dry, wrap one long edge of burlap tightly along the same long edge of the frame. Use the roller to make sure the burlap, contact cement, and frame bond together well.
While a helper holds the rolled edge of the frame from the previous step, grab and stretch the second long edge of the burlap, then pull it up and wrap it around the second long edge of the frame.Try to stretch it evenly both side to side and top to bottom. This is perhaps the trickiest part of the whole process. Roll the side to get firm bonding between the burlap, contact cement, and frame.
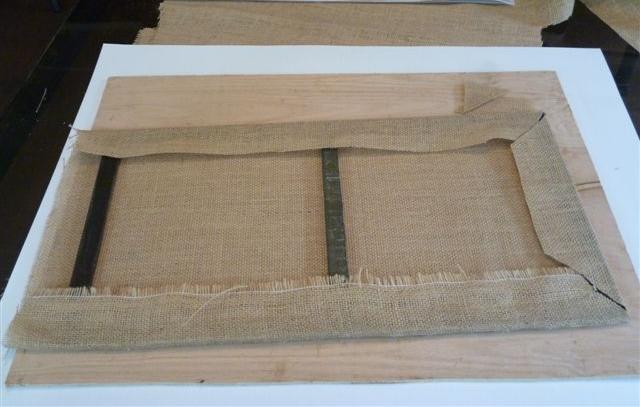
As you can tell from the pictures, I don't yet consider myself an expert at this, but the final result looked pretty good. Cut a lengthwise slit in the folded portion of the grillcloth. Cut a 45 degree cut in the short side, followed by a 45 degree cut in the long side, then fold over the cut ends. My experience was, even though this is contact cement, it was possible to pick some things up and rearrange them a bit.
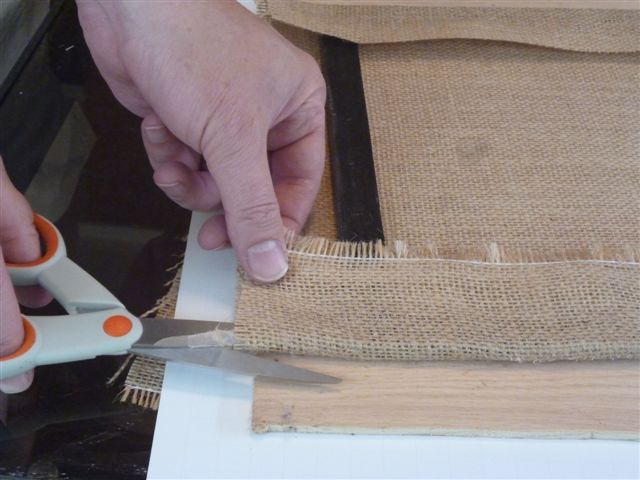
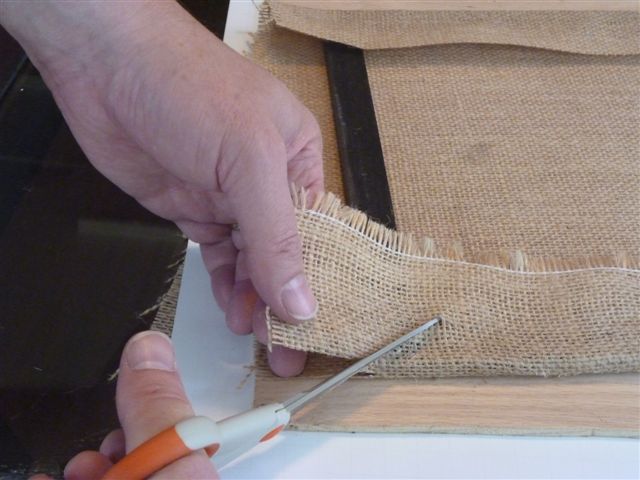
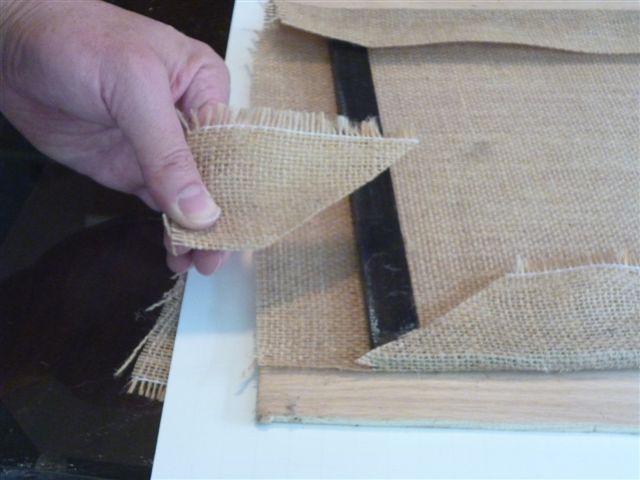
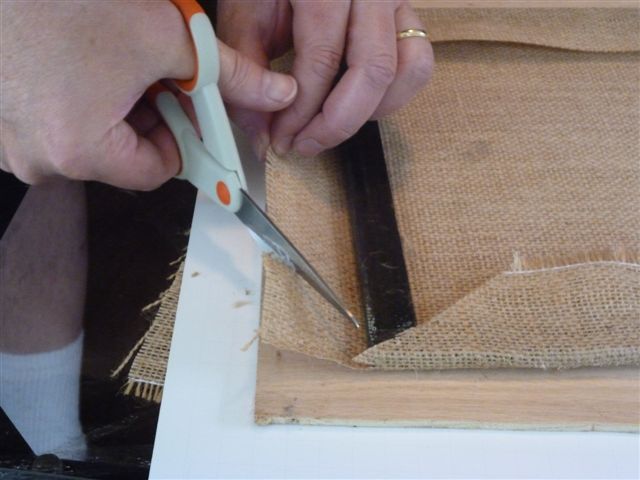
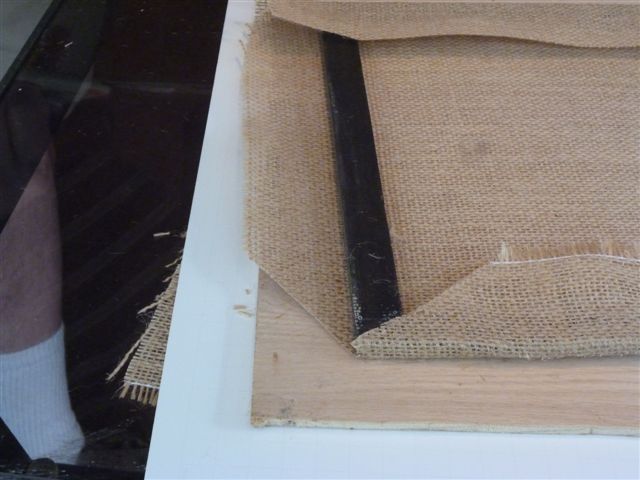
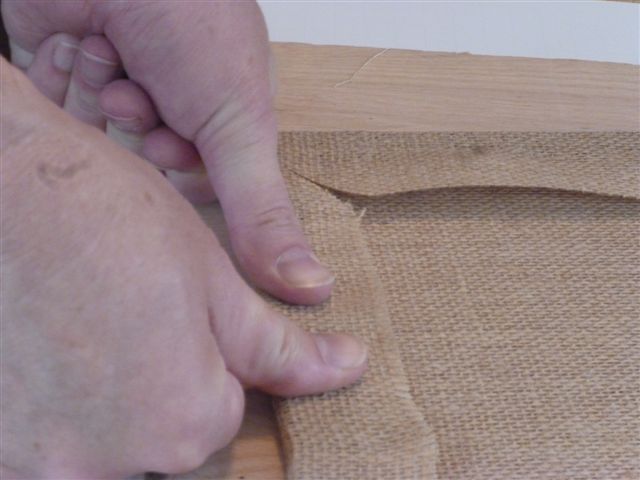
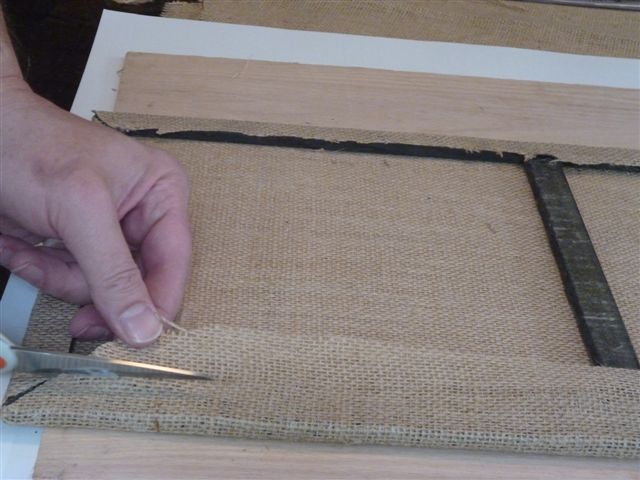
Trim the extra on the inside of the frame with scissors. Be careful that your scissors are cutting only the extra bit, and not cutting through the front grill cloth.
Cut 1" pieces of velcro, and staple them in place, just where the old ones were. Use 1/4" staples.